How to Connect Your APEX Futures Account to TradingView (Step-by-Step Guide)
If you’ve ever wanted to trade your APEX Futures account directly from TradingView, this post is for you. In this quick guide, we’ll walk through the exact steps to connect your APEX account via Tradeovate and start placing trades seamlessly from your TradingView charts.
What You’ll Need
Before we begin, make sure you have the following:
-
✅ An active APEX Futures account
-
✅ A Tradeovate login (you’ll receive this after purchasing your APEX account)
-
✅ A TradingView account (free or paid)
-
✅ CME market data enabled (for live chart prices)
Step 1: Purchase and Set Up Your APEX Account
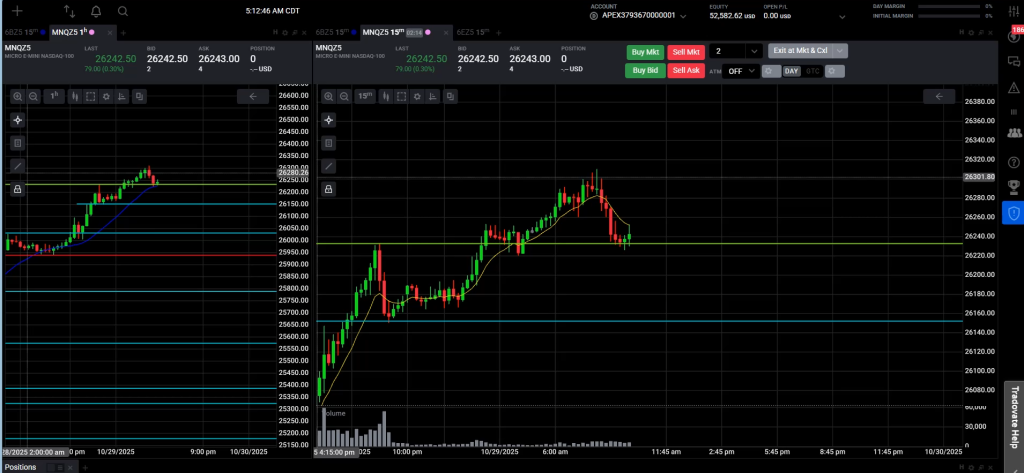
First things first — head over to the APEX Trader Funding website and choose your account size. Once purchased, APEX will give you access to Tradeovate, which is the platform your account runs on.
Tradeovate acts as the middle-man platform that allows you to connect your APEX account to TradingView.

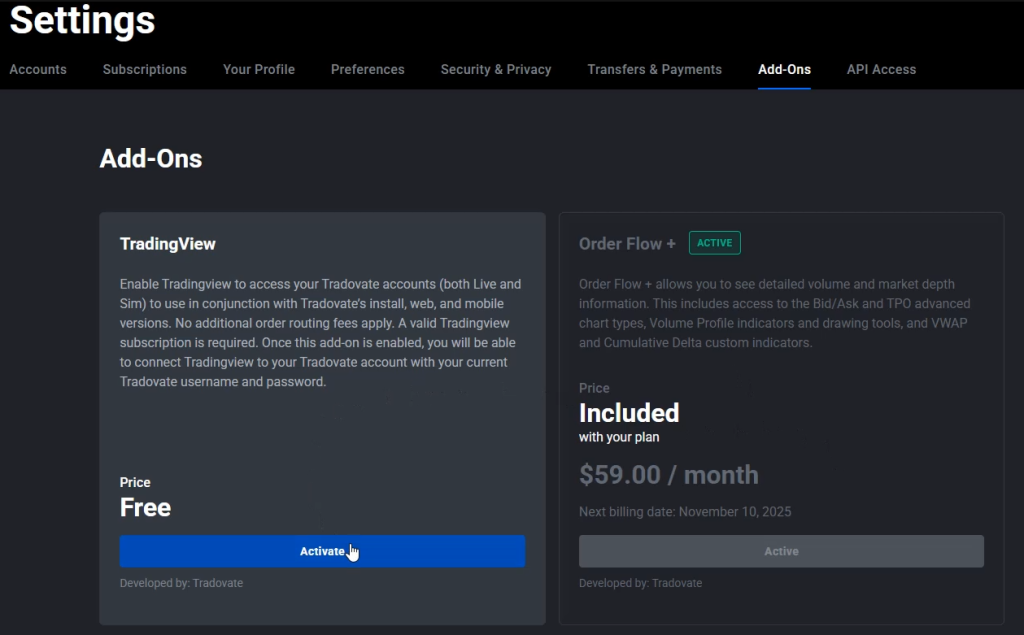
Step 2: Activate TradingView Inside Tradeovate
To enable TradingView connectivity:
-
Log in to your Tradeovate dashboard.
-
Click on the settings icon (top-right corner).
-
Go to the Add-ons section.
-
Find TradingView and click Activate.

This step is crucial — if you skip it, TradingView won’t be able to recognize your APEX/Tradeovate account later.
Once activated, you’re good to go. You can now close Tradeovate and move on to TradingView.
Step 3: Select the Correct Futures Chart in TradingView
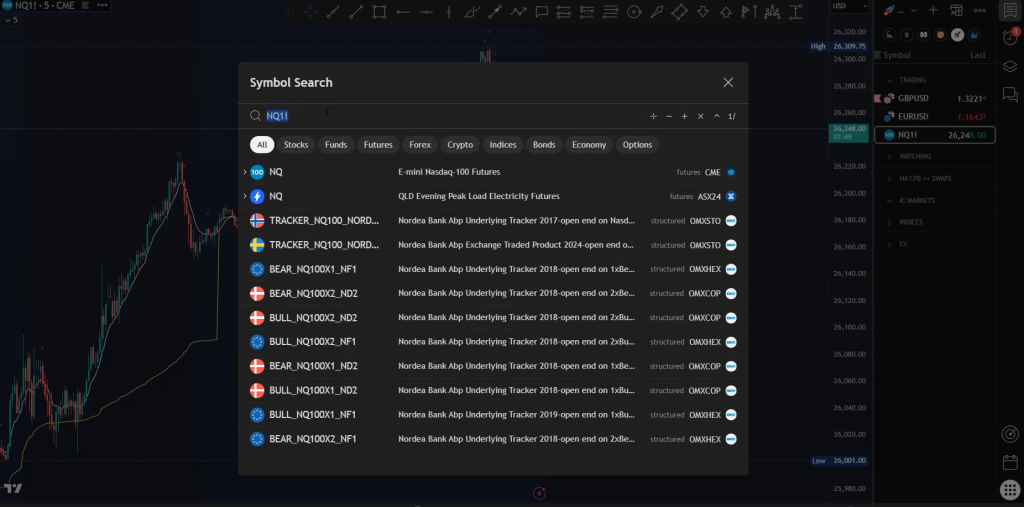
Now open TradingView, and make sure you’re viewing a Futures chart from the CME exchange.
For example:
-
Type NQ1! for NASDAQ Futures
-
Or ES1! for S&P 500 Futures

👉 Important: If you haven’t purchased CME data on TradingView, your chart prices will be delayed by 15 minutes. For real-time data, subscribe to CME data directly inside TradingView — it costs less than $10/month.
Step 4: Connect TradingView to Tradeovate (Your APEX Account)
At the bottom of your TradingView screen, open the Trading Panel.
You’ll see a list of available brokers — scroll until you find Tradeovate and click Connect.
When prompted, log in using the same username and password you use for APEX/Tradeovate.
Once connected, you’ll see your account balance, positions, and orders update live — confirming that your APEX Futures account is officially linked to TradingView!
Step 5: Start Trading from TradingView
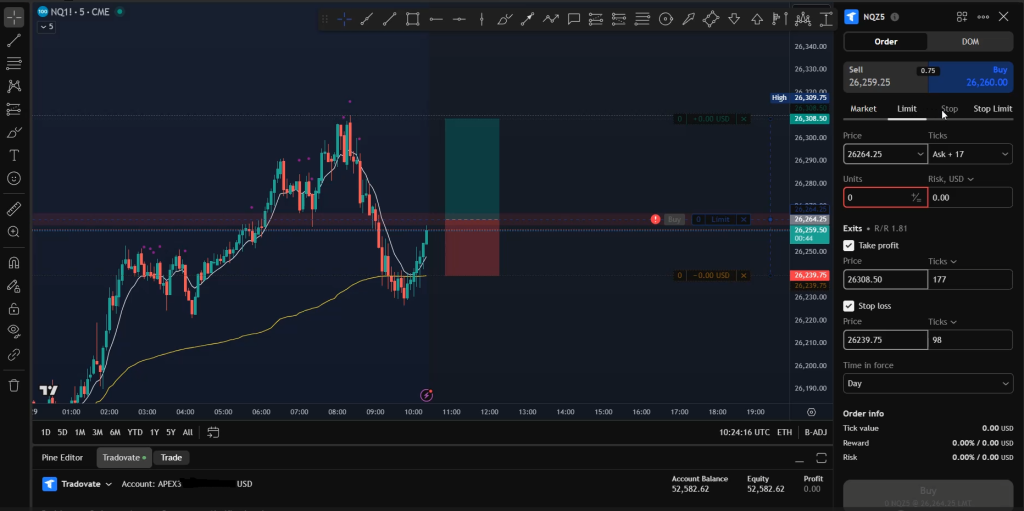
With the connection live, you can now place trades directly from your charts:
-
Click “Trade” at the bottom of the screen.
-
Choose Buy or Sell.
-
Set your Stop Loss, Take Profit, and Contract Size.
TradingView’s intuitive interface makes this process quick and visual — just right-click anywhere on the chart to create an order and manage your risk visually.

Pro Tip: Use Stop-Limit Orders
When trading futures via APEX and Tradeovate on TradingView, it’s best to use Stop-Limit orders instead of Market or Limit orders.
This ensures your entry executes only once price reaches your target zone — perfect for breakout and BOS (Break of Structure) strategies.
Final Thoughts
That’s it! You’ve successfully connected your APEX Futures account to TradingView through Tradeovate.
Now you can take advantage of:
-
⚡ Real-time execution
-
📊 Trading directly from your charts
-
💼 Integrated account management
-
🧠 Better control over your trade visualization
TradingView and APEX together create one of the most efficient setups for prop firm futures traders — simple, fast, and professional.
Thanks
Stephen V
FundedNext Prop Firm https://fundednext.com/?fpr=stephen18
The5%ers Prop Firm http://www.the5ers.com/?afmc=xvc
FTMO Prop Firm https://trader.ftmo.com/?affiliates=q…
LinkTree: https://linktr.ee/onlinepropfirm_step…
SOCIALS: Instagram:  / onlinepropfirms
TikTok:  / online.prop.firms
Watch the Full YouTube video here..
Our TikTok page here… https://www.tiktok.com/@online.prop.firms
Our Instagram page here… http://www.instagram.com/onlinepropfirms/reels
📈 TradingView – Free Charting Platform https://www.tradingview.com/


